Leak Report | 3625 Serra Road
| Created | |
|---|---|
| Tags | Home-Repair |
Summary of Findings
Leak Sources
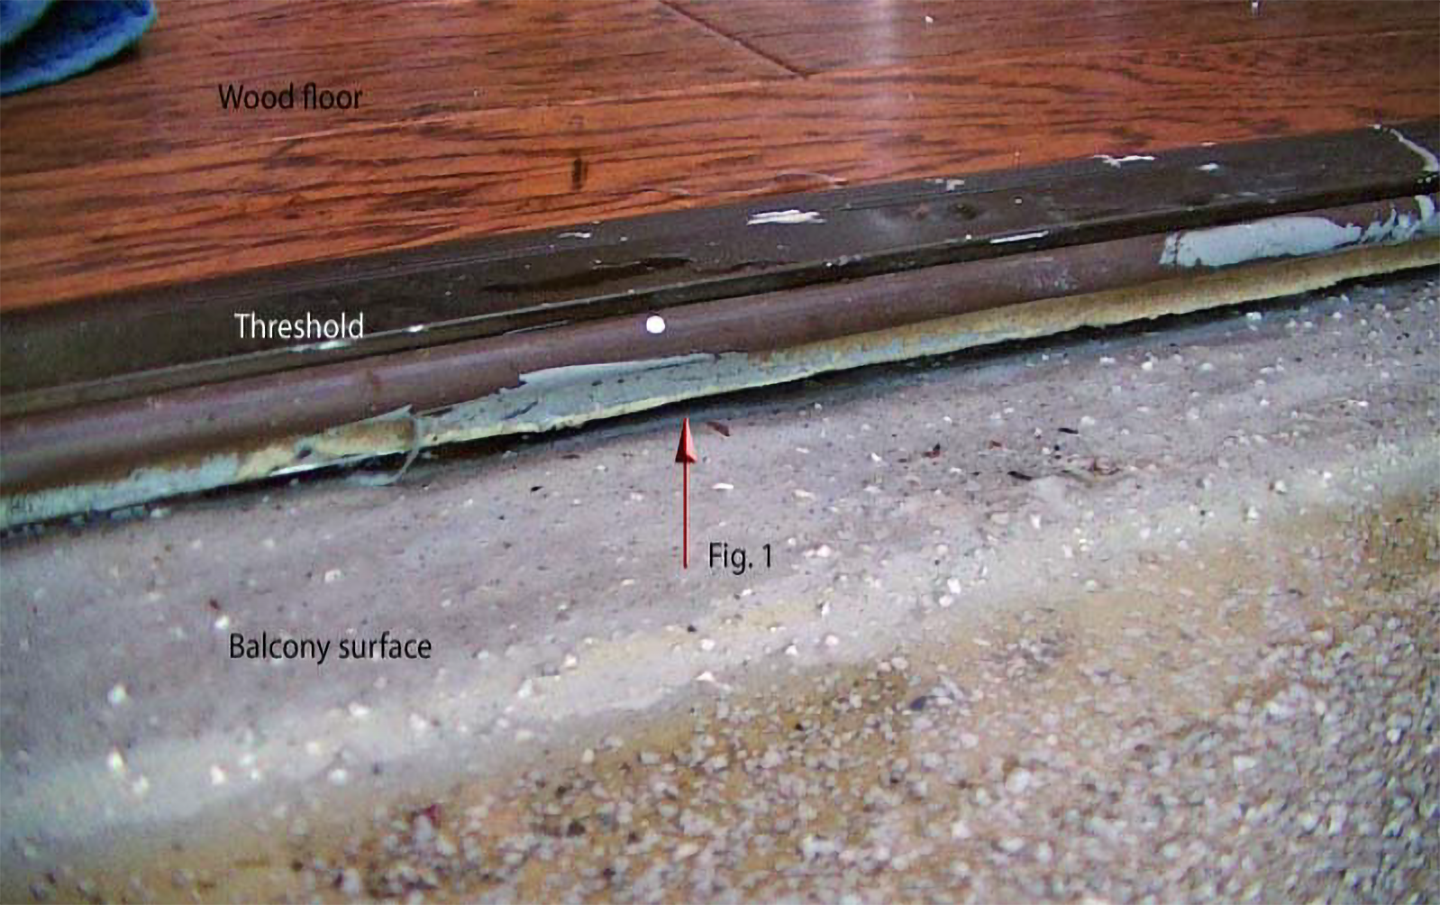
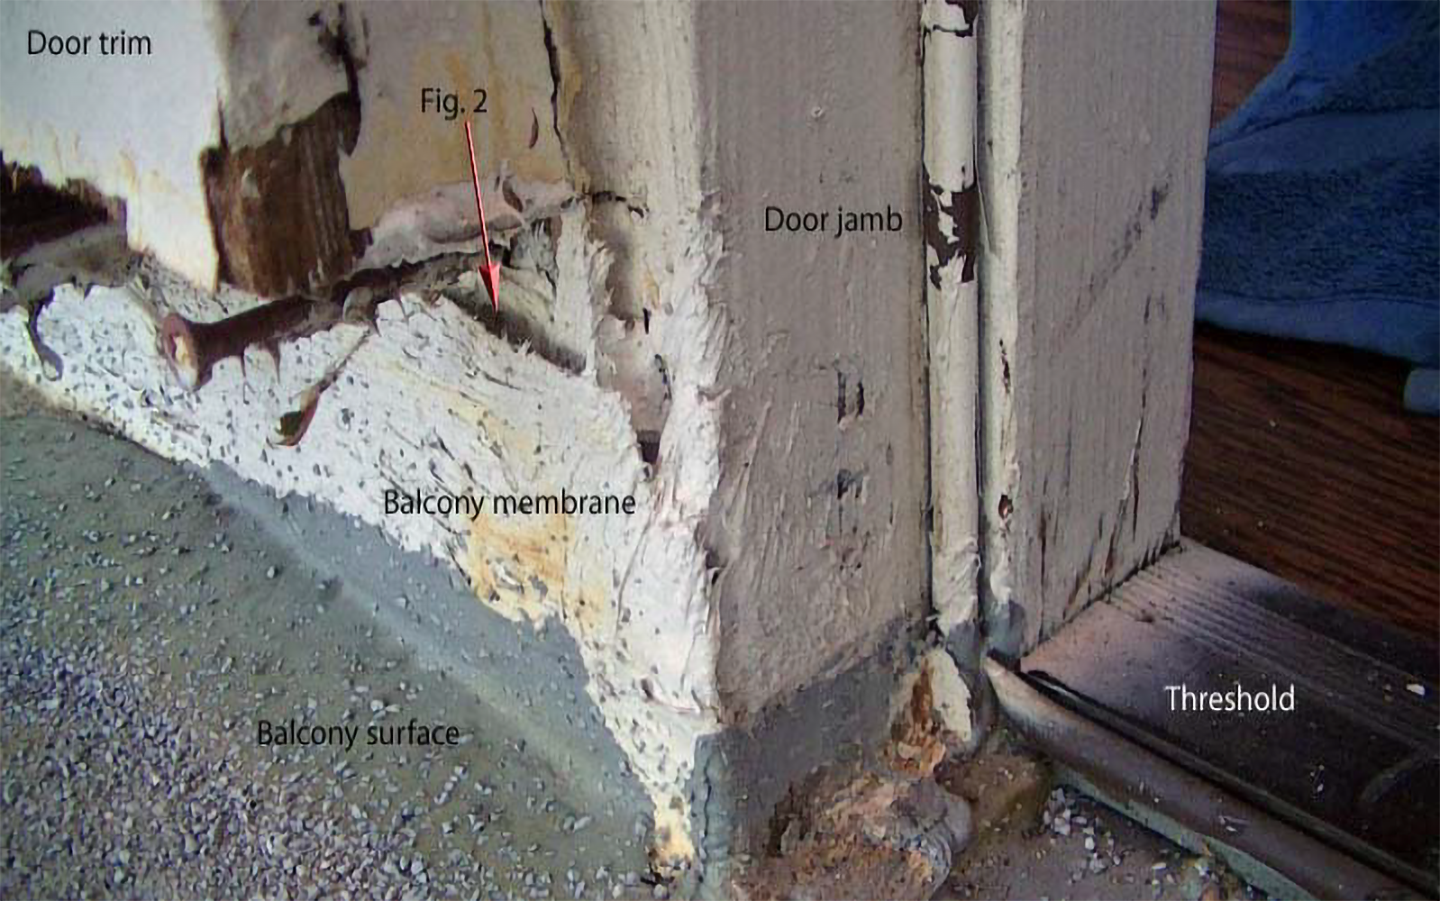
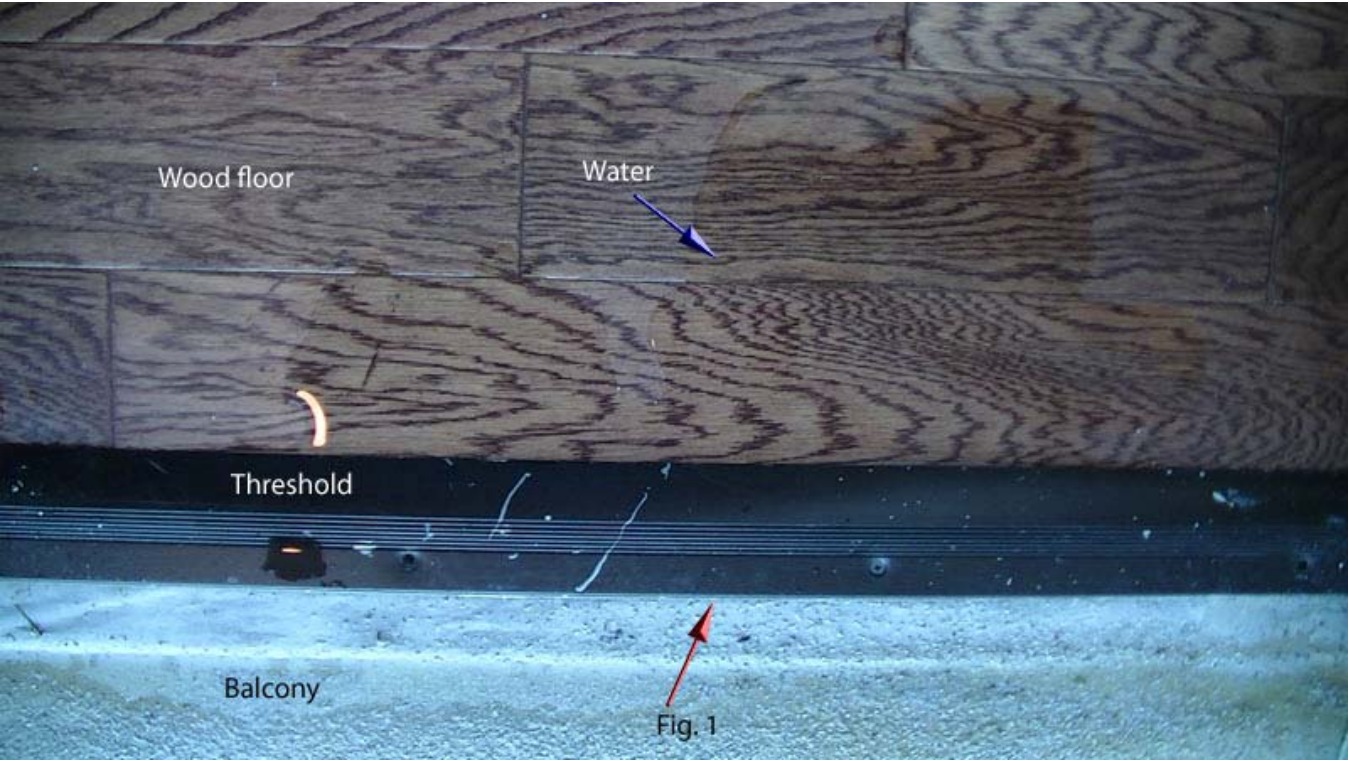
(1) Balcony Door Threshold
Water gets under the threshold, leading to water on the floor, kitchen ceiling, and structure below (Figure 1) . The balcony membrane rolls up the door jamb and under the door trim, allowing water into the kitchen structure below (Figures 2 & 3) .
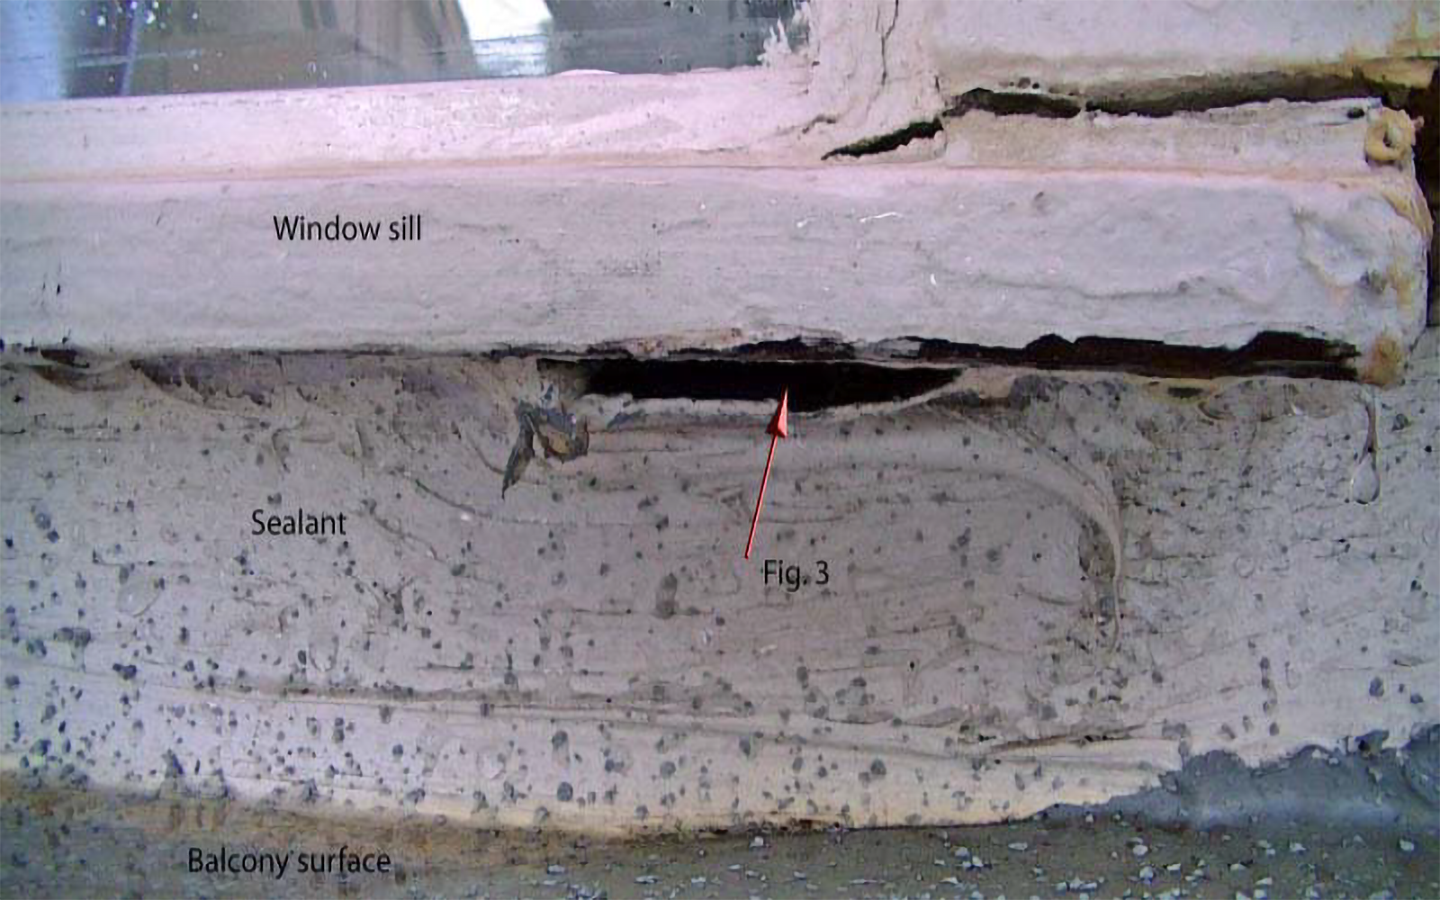
(2) Window Joints
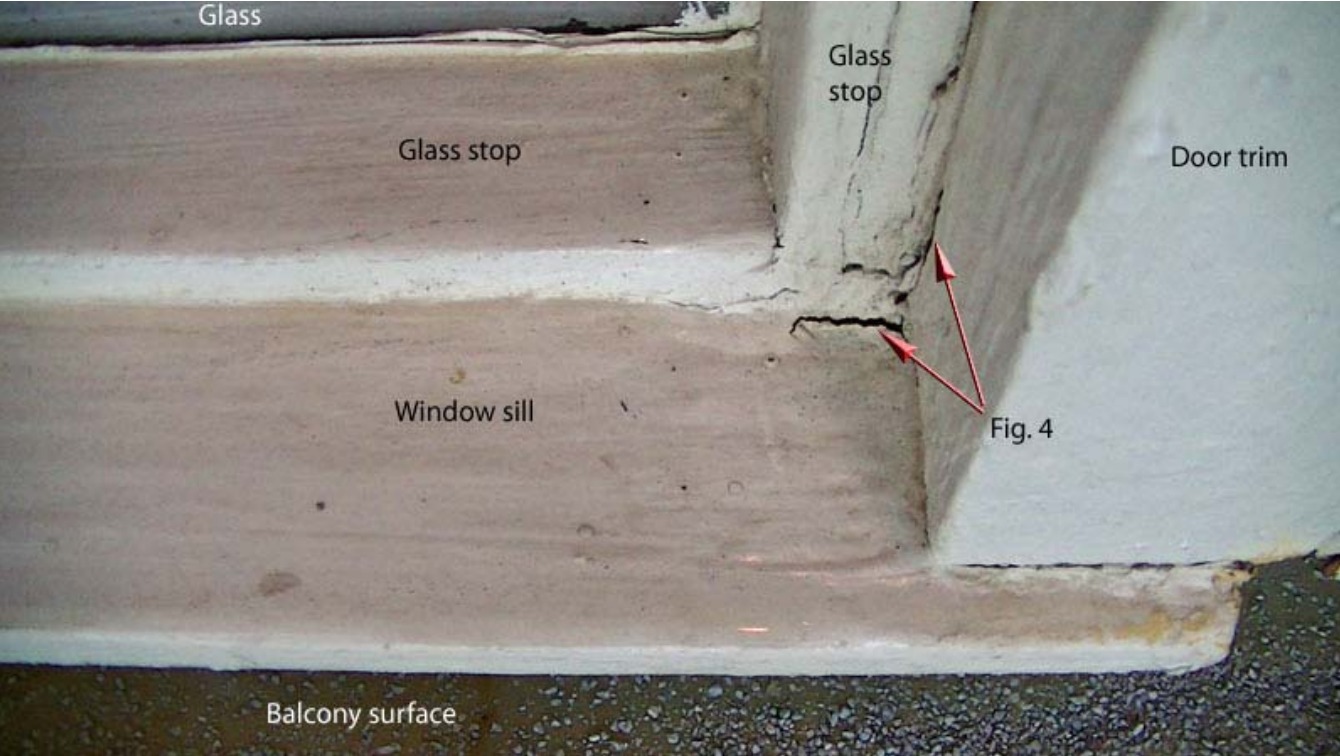
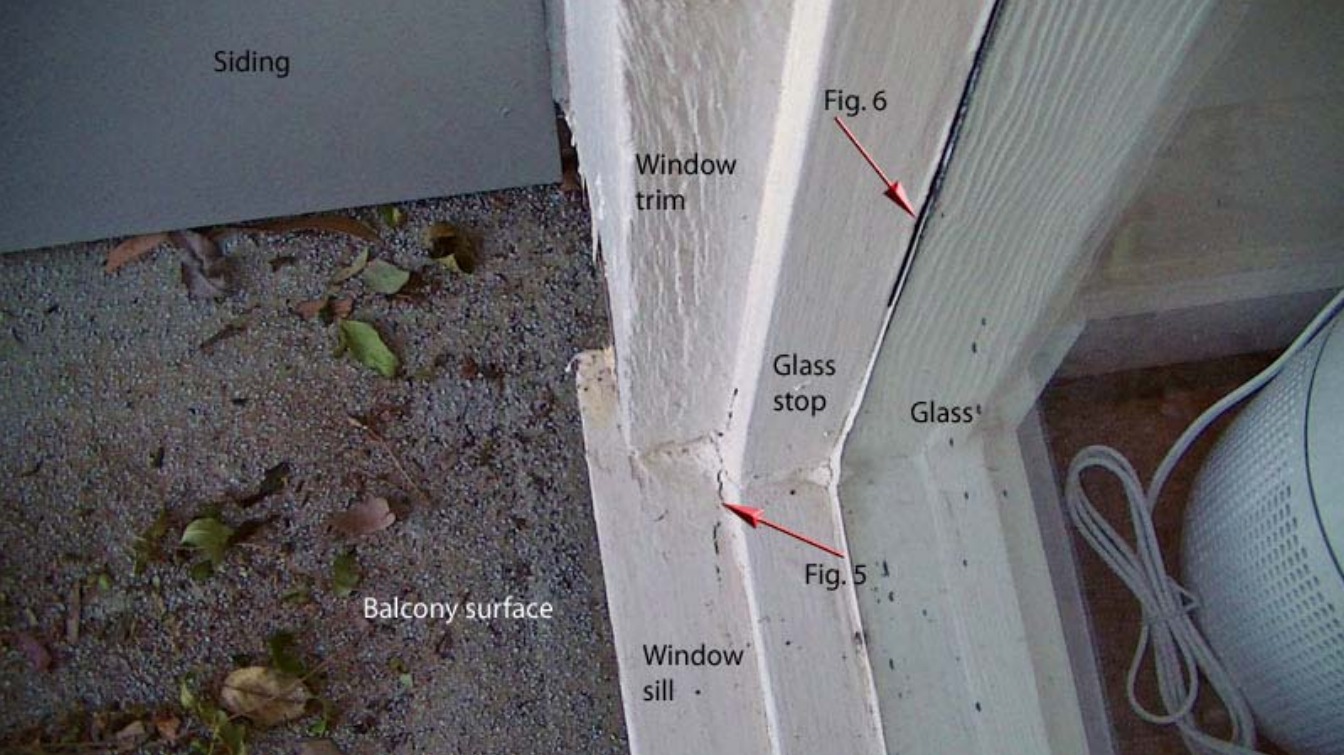
Leaks at joints of window trim, stops, and window sill, causing water in the ceiling below (Figures 4 & 5).
(3) Glass-to-Glass Stop
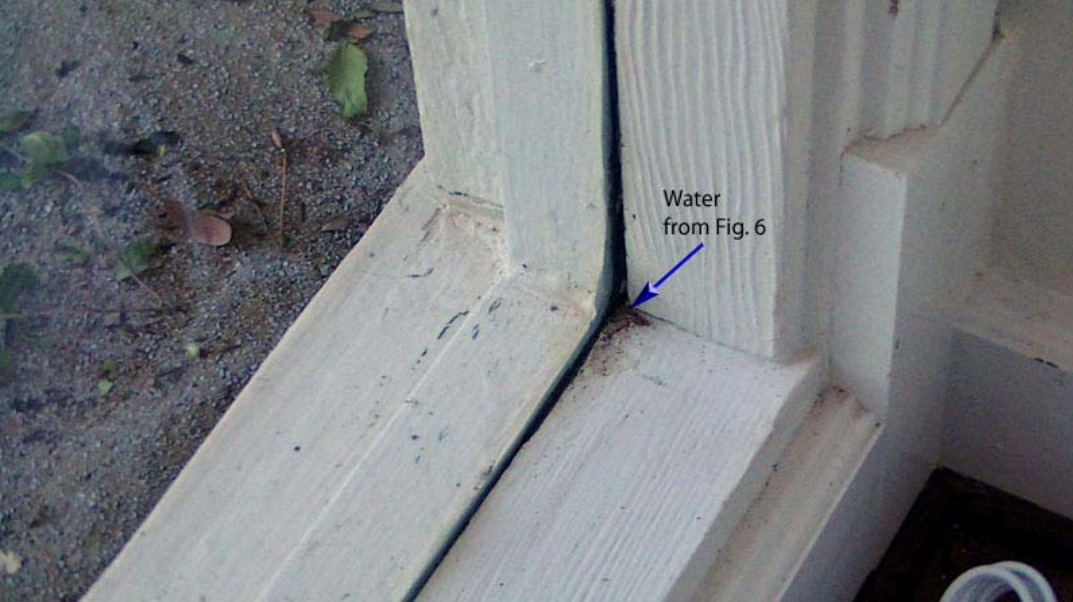
Leak between glass-to-glass stop, allowing water into the structure (Figure 6).
Due to the plethora of leak sources on and around this window and door unit at least, I suggest standardly re water proofing these door and window units in the red outline area shown in photo shown on the first page like that shown in the example photos shown on recommended remediations.
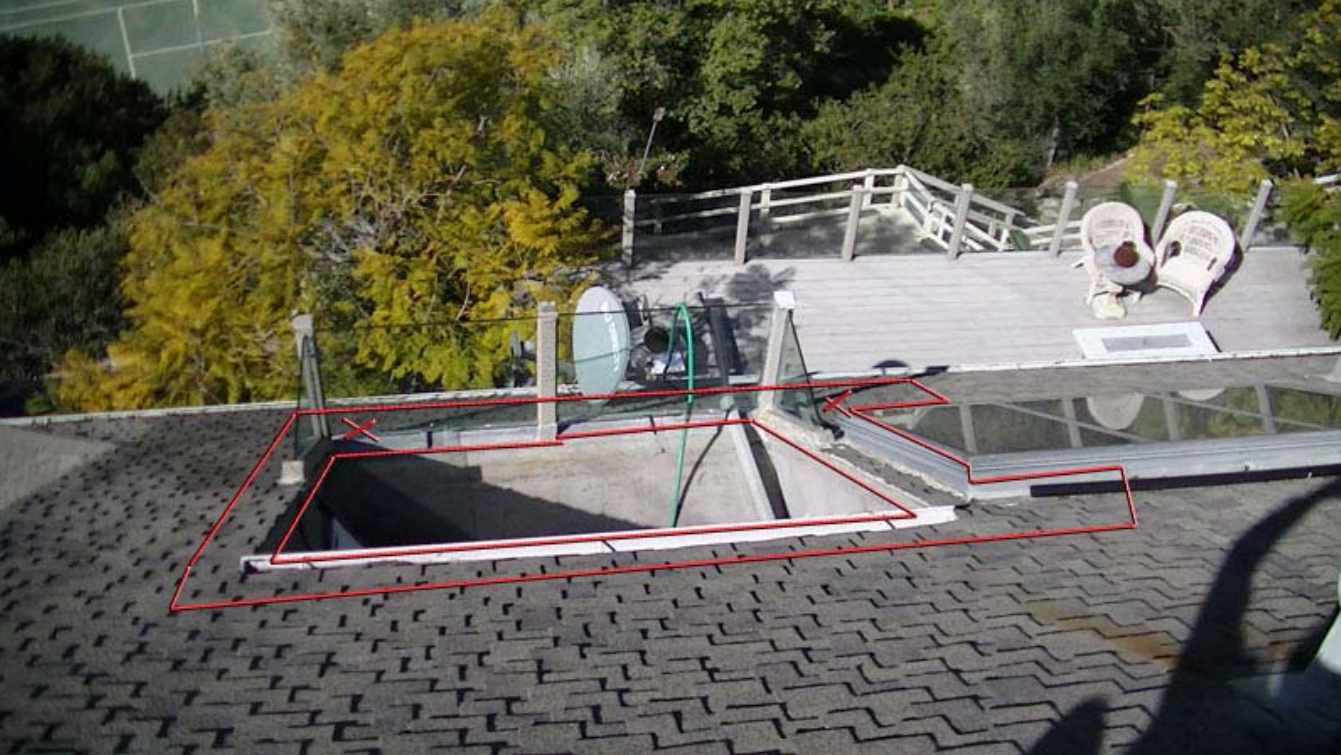
(4) Roof Segment & Shingle Ends
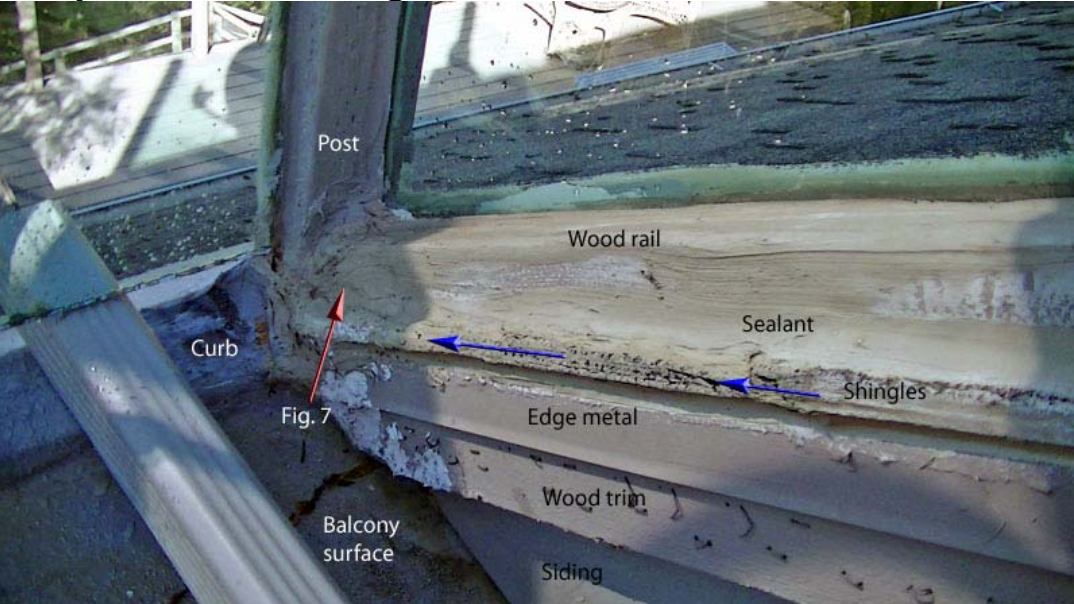
In the photos below (Figures 7, 7.1, 8), are leak sources where water getting in between the shingles at the ends, gets under and between them and runs down to the posts (blue arrows) where there is insufficient water proofing under the shingles, wood trim and caulking around these posts which allows water in the ceiling and walls below. Topical seals will not and are not adequate to resolve these leak sources. A standard re-water proofing of the red outline area delineated in the photo below (Figure 9), using a method like that shown in the example photos in the recommended remediations. This will involve removing the edge metal, shingles and wood trim at least and most likely the siding and then water proof from the balcony up the wall and onto the roof at these corners of the deck back from the curb about 1’ and then carry on with the edge metal detail shown in the drawing on the recommended remediations.


Recommeded Remediations
Balcony Door Threshold, Window Joints, & Glass-to-glass Stop:

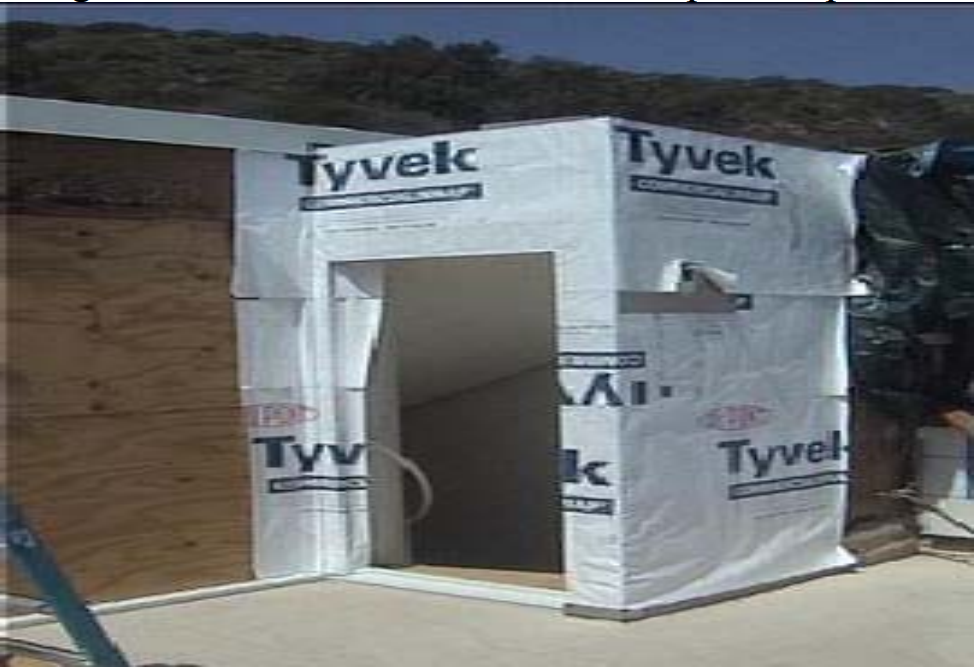
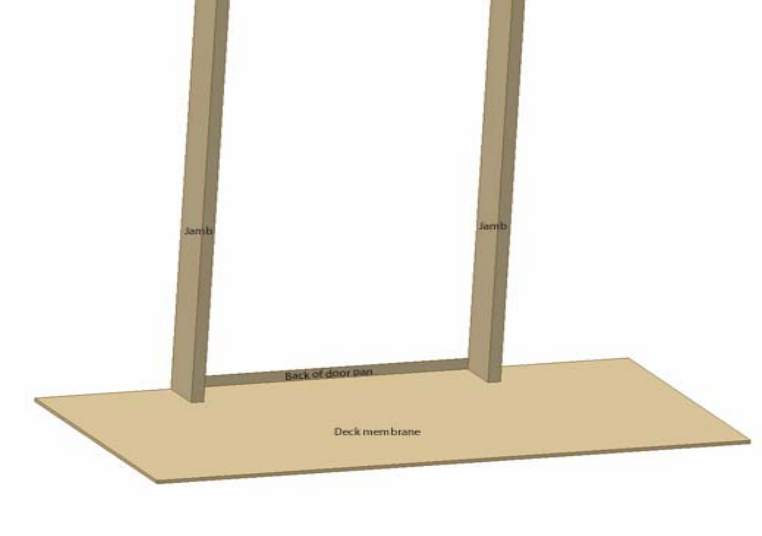
Integration of Balcony Membrane into Door Pan & Up Wall
The upper left drawing (Figure 11) shows a partial standard balcony to wall application I suggest; or the like. The upper left (Figure 12) example photo shows a good door pan application with the balcony membrane integrated into the door pan and up the wall.
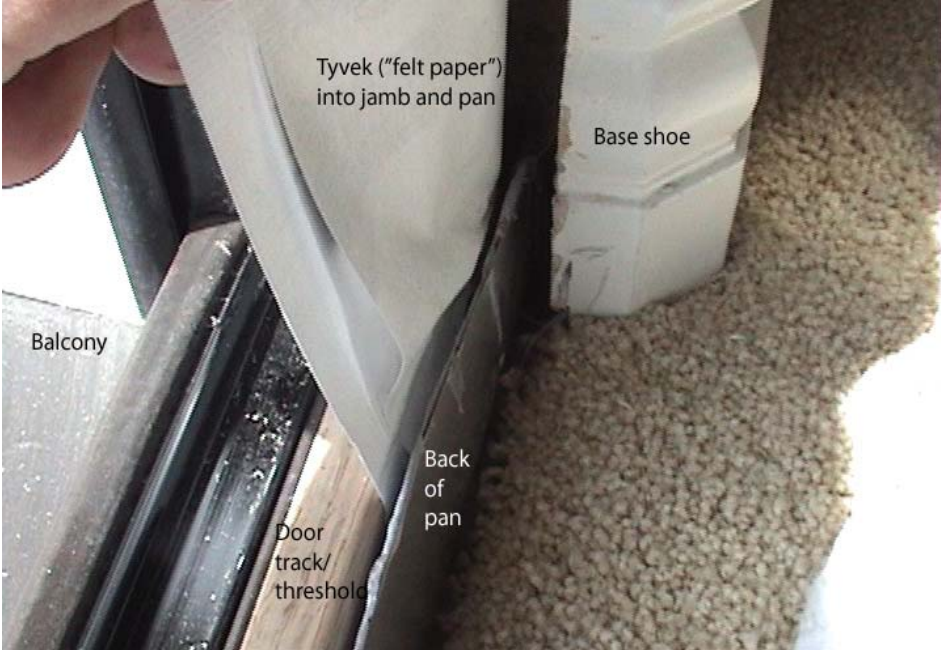
Membrane & Threshold Application
The upper left example photo (Figure 13) shows the Tyvek wrapping into the jamb and into the door pan. The upper right example photo (Figure 14) shows the juxtaposition of the back of the pan to threshold in that it is the same height as the threshold and offset about 3/16” from it to catch water coming in over the threshold, dumping into the pan and being routed back out. Do not seal the top of the pan to the bottom of the threshold as it is a water routing system. Make sure you pitch the pan out and put 2”x 3”: strips of bituthane on top of pan, back to front on left, middle and right to raise the threshold from the pan for water to flow freely once water gets on it. The lower drawing (Figure 15) can also work for your door pan but the one shown in the previous drawing (Figure 14) is more ideal- raised above the surface of the balcony. You would have to change out the threshold for either one so the height of the threshold is about 1” so the back of the pan would be about 1” as well. The current threshold will not work as the back of it is too low.

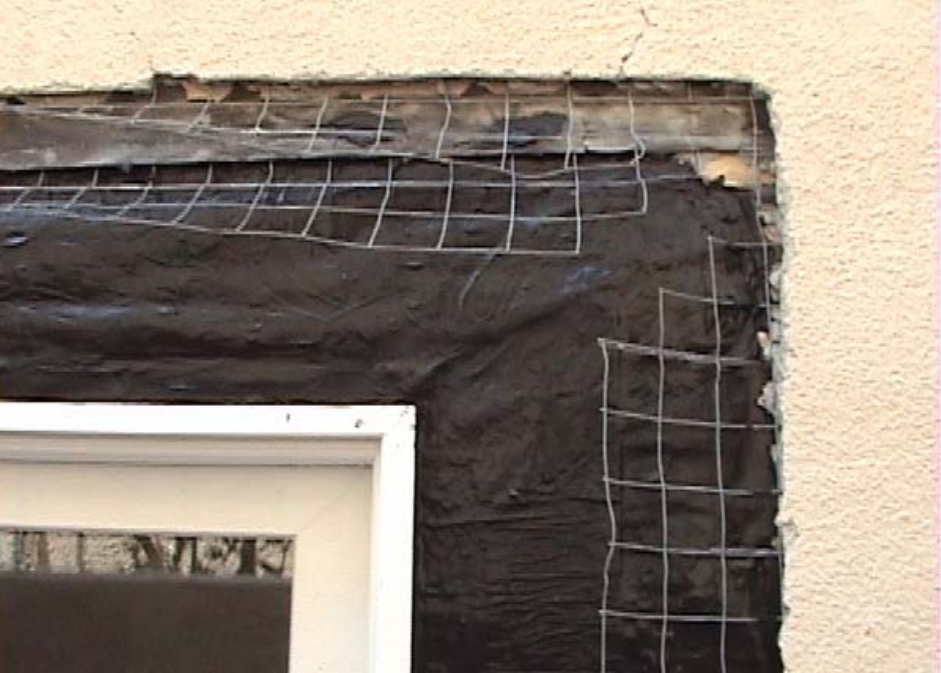
The upper left example photo (Figure 16) shows the door installed and visibly sealed. This can go through heavy rains and not leak. The upper right example (Figure 17) photo shows a good old to new felt paper tie in- visibly sealed. Again, water proofing is to be done behind the stucco and you must not molest the felt paper where you are to tie into it so you do not create new leaks.
Roof Segment & Shingle Ends:

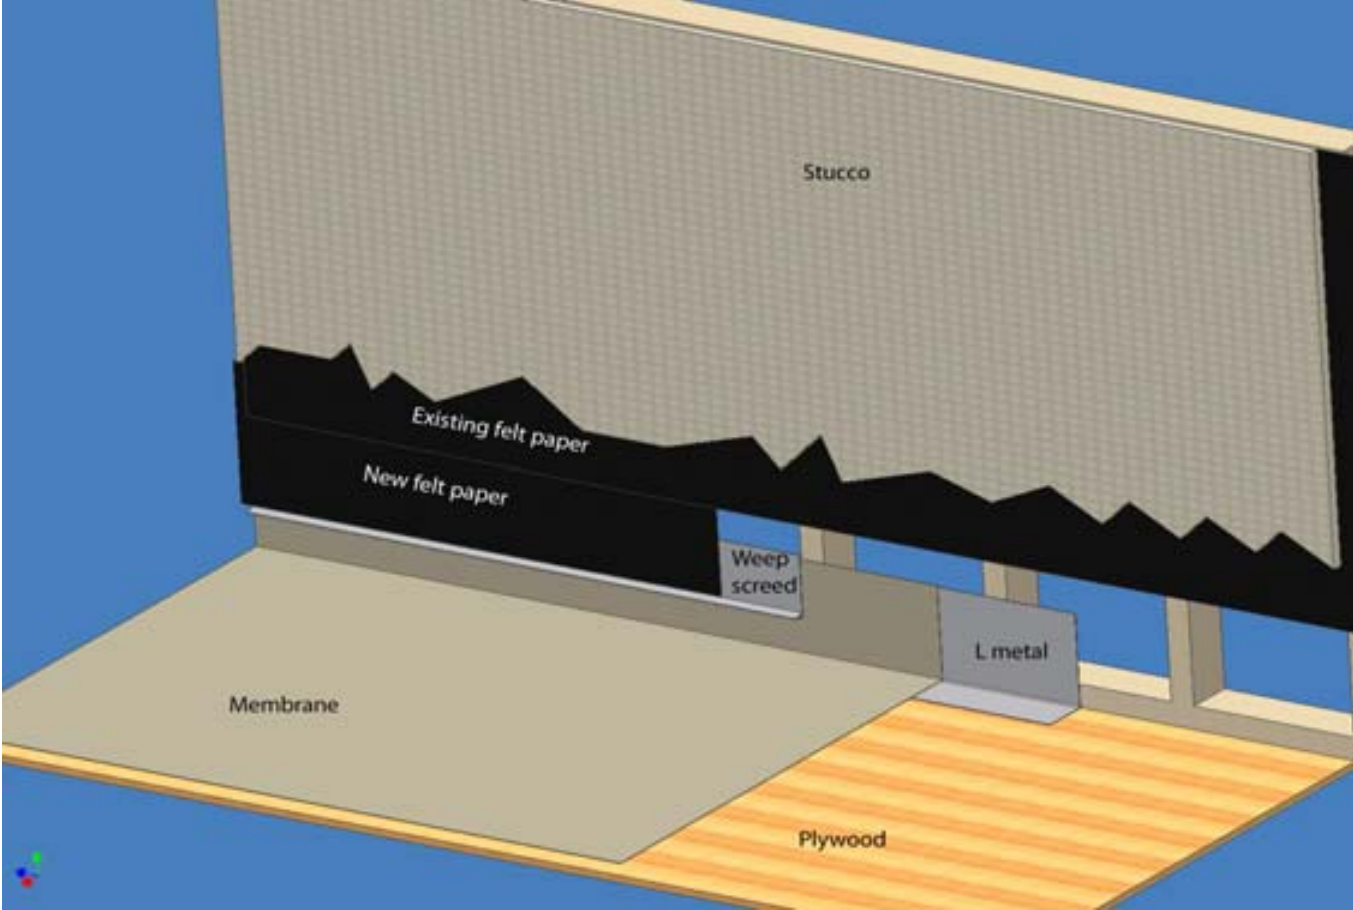
Edge Metal Application
The example drawing to the left(Figure 19) is a good edge metal application I suggest for your wall to roof area. The underlayment would be the Ice shield or High Heat Grace underlayment material for which the shingles would then be applied over it. The first layer would go over the wood trim once you removed it to water proof under it especially where it ends at the posts. Then the edge metal and another layer of Grace underlayment over the edge metal part on the roof etc.
Underlayment Application
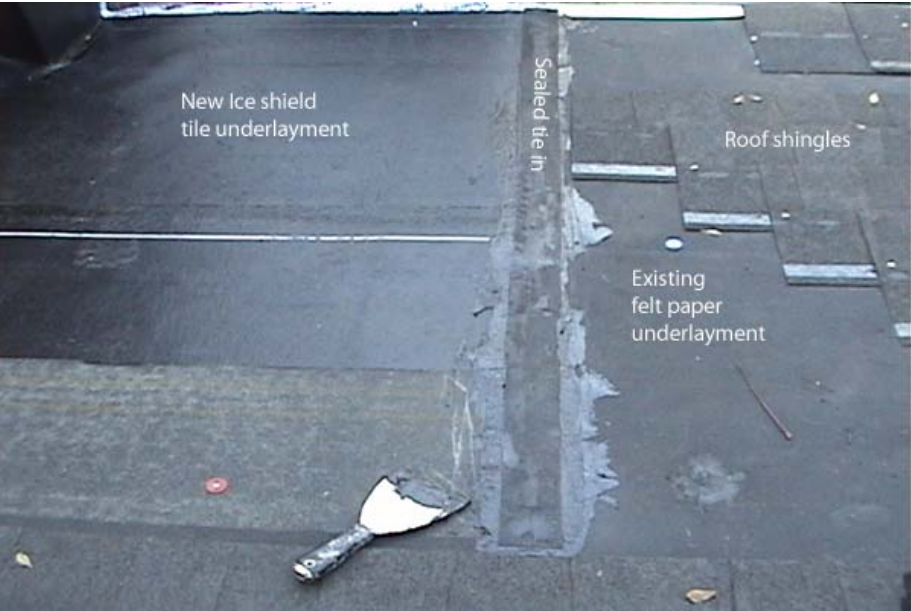
The example photo to the left (Figure 18) shows a good tie into existing underlayment under the shingles and a good seal between the two that I suggest. This prevents water intrusion by way of entering the lap diagonally and thus getting under the underlayment and leaking.
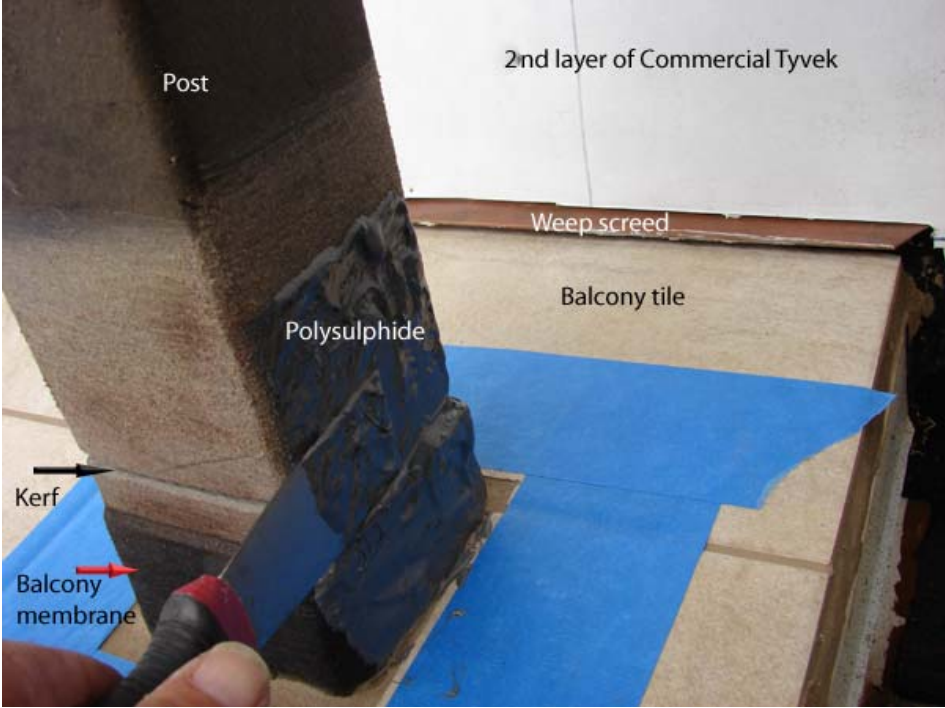
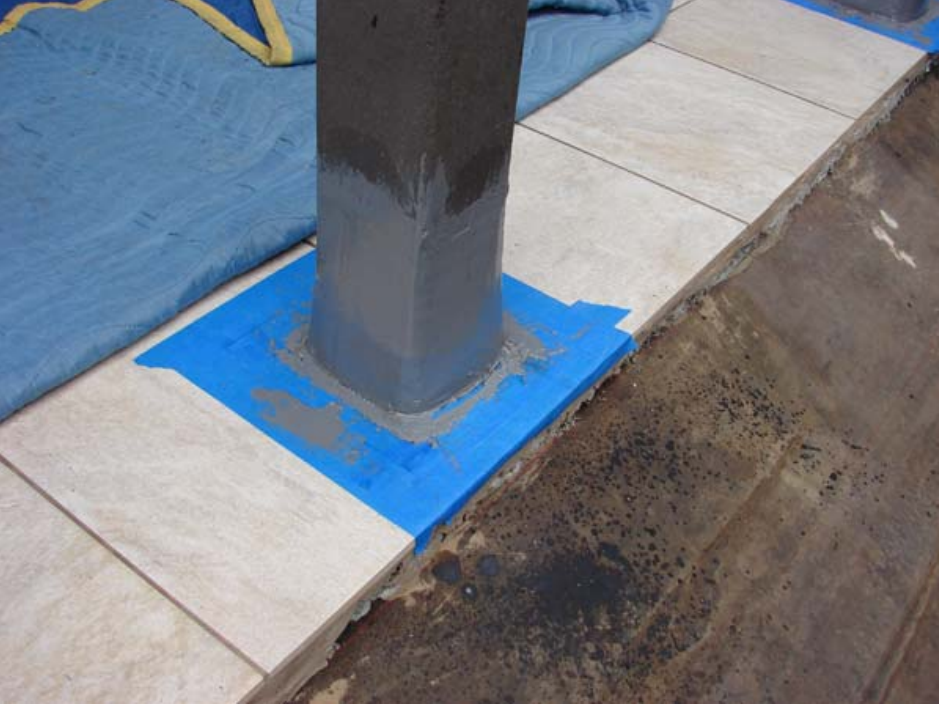
Balcony Post Application
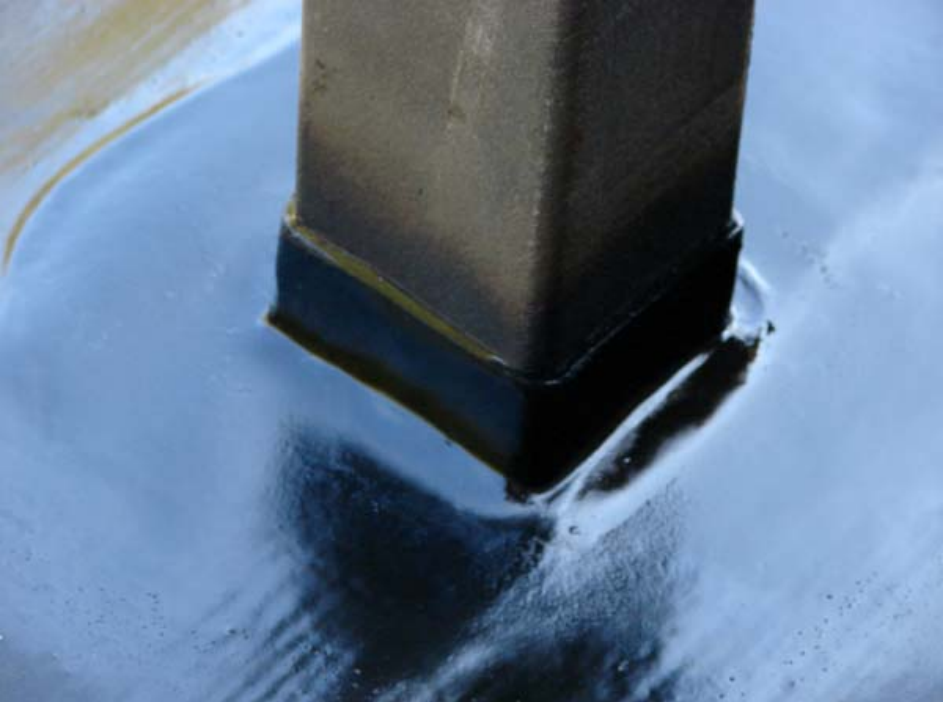
The first photo (Figure 20) shows the deck membrane rolling up the post. The second photo (Figure 21) shows a kerf (3/16”cut) in the post with a rubber flashing being applied into the kerf and then over the balcony membrane. The third photo (Figure 22) shows the finished product of a rubber counter flashing to the deck membrane rolled up the post. I suggest the rubber rather than metal as the rubber has no joints that have to be soldered and or sealed.
Nick to start Mid-May